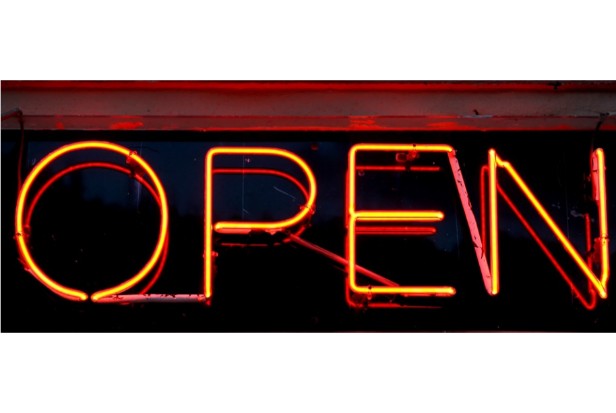
In this post, we’ll show you the Signs of a Bad Ballast and how to Change the ballast on your faulty fluorescent lights.
Unlike LEDs and incandescent bulbs, fluorescent lighting needs a ballast to ensure that the right amount of power is delivered to the bulb or tube.
Enough voltage is delivered by the ballast to initiate the lighting process. As soon as the illumination starts, it reduces the electricity to create a steady light.
Fluorescent bulbs would use the 120V current without a ballast, quickly burn out, and damage the product. You’ll notice or hear symptoms if it malfunctions, alerting you to the need for a potential replacement.
What is a Fluorescent Ballast?
Fluorescent lamps are made up of many parts. By ionizing mercury vapor, which causes the gas’s electrons to emit photons with UV frequencies, light is produced inside the glass tube.
A phosphor coating on the inside of the tube converts these frequencies into regular visible light.
To get the electrons to move from one electrode to another and create an arc, a high voltage is used. Fluorescent lamps with colder filaments require higher voltages, which explains why some of them start out dimly before brightening up fully. The lamp is warming the gas.
The current generated by this process is controlled with the aid of a ballast. The lamp would overheat without it as the current would quickly increase. The ballast supplies a high voltage supply quickly, starts the arc, lowers the voltage, and then controls the current flow to maintain constant light output.
When Should Fluorescent Bulbs Be Replaced?
Typical lamp life for a fluorescent bulb is about 20,000 hours, but this can degrade as a consequence of frequent switching (turning on and off). Lamps that are left on continuously for extended periods of time have longer burn times.
What Happens When a Light Ballast Goes Bad?
A deteriorating ballast is a reason why your fluorescent light flickers or makes a loud, annoying hum. The ballast takes in electricity and then regulates the current to the bulbs. The average lifespan of ballast is around 20 years, but it can be significantly shortened by cold environments and subpar bulbs.
What Happens When a Fluorescent Bulb Burns Out?
As the light gets closer to its end, expect it to fade. When it does burn out, expect a dramatic pop and a distinct odor. When the base of the CFL bulb turns black, it may even start to smoke.
Signs of a Bad Ballast
Low Output
After turning on the lights, if they stay dim for a while, you might have a problem with your ballast, especially if you just changed the bulb.
Flickering
Flickering or strobing that occurs periodically can be very annoying. Additionally, it might indicate a problem with your ballast.
Buzzing
A ballast that is about to fail will frequently begin to hum or buzz.
Inconsistent Lighting Levels
With fluorescent lamps, fading light and color alterations are typical. Dark corners or uneven lighting could, however, be signs that your ballast isn’t functioning properly.
Delayed Start
Keep in mind that the voltage needed to turn on your lamp’s internal components comes from the ballast. An increased delay is a sign of a bad ballast even though a warming start might be anticipated.
Checking for a Bad Ballast
There are steps you can take to test whether your ballast is the problem if you can’t find any obvious signs of a bad ballast and you’ve already tried changing the bulb.
1. Turn Off the Power
To check the ballast, you must safely turn off the fixture at the circuit breaker. As a further measure of security, check to see if the voltage is still present. The majority of the time, you’re fine if you flip the switch and nothing happens even though there was something there before; however, electricity is nothing to play around with.
Remove the lens cap from the fixture. Some are encircled by the fixture or secured with slides or screws. When performing this work, use caution to prevent breaking it.
2. Take Out the Blubs
You can take the cover off and take the fluorescent bulbs out of your light fixture. If they are circular, a plug connecting the item to the ballast can be seen. Instead, straight and U-shaped bulbs are installed in the sockets that connect them.
A tension spring will hold a U-shaped bulb in place. To remove the bulb from the socket, gently pull on it.
To remove tubes from their sockets, they can rotate either clockwise or counterclockwise.
3. Remove the Ballast Cover
If the ballast cover isn’t already off, you can take it off after you’ve taken the bulbs out of the fixture. The majority of covers fasten with screws or slot inserts.
Visual damage to some ballasts is evident right away. It must be taken out if it is burning, swollen, or leaking oil.
Go to the next step if you’re unsure.
4. Check the Ballast With a Multimeter
Set the multimeter to the ohm position. If you have a choice of options, you should put it on the X1K option.
The white wires should be held together as you insert one probe into the wire connector. the ends of the yellow, red, and blue wires coming from the ballast should be touched with the other probe. Some people might ignore the yellow.
You know the ballast needs to be replaced if it doesn’t make the needle move. A quality one will read across the tool’s face or sweep the needle.
5. Install the New Ballast
You simply swap out the current ballast for the new one when you need to replace it. The fixture should then be tested to see if it functions by turning on the power at the breaker box after replacing the fluorescent bulbs and reinstalling the cover.
If everything goes according to plan, the lights should turn on smoothly without buzzing or flickering. Depending on how quickly the equipment warms up, the symptoms might go away after a few minutes.
You’ll have to go back and check the connections for the bulb, the ballast, and other components if the fixture doesn’t work. Up until the lights are turned on, keep checking.
You can change the fixture cover once the fluorescent lights are operational.
How to Work on a Ballast Safely
You’ll require access to the fixture when you need to replace a bad ballast with a good one. Since the majority are installed on ceilings, you’ll need a stepladder that can get to that area.
The ladder is the safest way to work on the unit, despite the temptation to stand on a chair or other piece of furniture. When checking the lights and ballast, have someone there to serve as your sighted person to prevent any slippage.
A deeper wiring problem may need to be fixed if your ballast keeps burning out or shorting out. This issue could also be a sign of a line short.
If after changing the ballast there are still unwelcome flickers or noises, you should probably get a professional electrician to take a look. Always take extra precautions when working with electricity.
Finding the Right Ballast
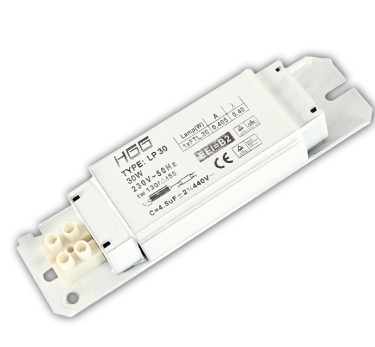
You need to know the kind of lamp, how many lamps, and the line voltage in order to buy a ballast that works with your current lighting fixture. Usually, your ballast’s label will have this information on it. It’s important to note that T12 fluorescent tubes have been phased out due to low energy efficiency; consequently, locating a replacement ballast may be difficult.
T12, T8, and T5 lamps and ballasts, with the T standing for tubular and the number indicating the diameter in 1/8 of an inch, are the most popular types of lighting equipment. A T8 ballast must use a T8 bulb, for example, so that your light fixture and ballast are compatible.
Particularly in larger spaces and commercial settings, fluorescent lighting can be the perfect solution. But a bad work environment can result from buzzing, buzzing, and discoloration. To maintain high productivity levels without undue strain, you should regularly check the operation of your ballast and keep fresh bulbs on hand.
Product Compliance and Suitability
The product statements in this manual are only meant to provide general information. The appropriateness, accuracy, completeness, correctness, or timeliness of the information provided is not guaranteed by such product statements, which do not constitute product recommendations. The advice provided in this manual is not intended to replace the use by you of any manufacturer instructions, technical product manuals, or other professional resources or advisers that may be available to you. Always read the manufacturer’s instructions, comprehend them, and abide by them.
Should You Replace Your Magnetic Ballast With An Electronic One?
It might be a good idea to consider switching to more recent electronic ballasts as many manufacturers are beginning to phase out the bulbs that work with older magnetic ones.
Magnetic ballasts are also deemed hazardous waste because they contain dangerous materials.
Switching to an electronic ballast might be your best option if your light fixtures are mounted in a way that makes replacing the entire fixture challenging. You will save a ton of money on your electric bill by using electronic ballasts, which are significantly more efficient.
Compare the costs of a new electronic ballast to a brand-new fixture, though, before you make a purchase.
You might discover that replacing the entire light fixture rather than just the ballast is simpler and more economical.
It’s not as difficult as it seems to troubleshoot your ballast for fluorescent lights.
All you need to get started is a fundamental understanding of how the mechanism functions, along with a few tools.
So, if your lights start to flicker the next time, don’t panic.
The problem can be quickly identified and fixed now that you know how to handle it.
Conclusion: Replace Your Fluorescent Light Ballast
You’ll be able to decide whether or not to replace your fluorescent light ballast after learning how to identify whether or not it is malfunctioning.
If it is broken, replacing it is simple and something you can do at home with a few simple tools.