A thorough explanation of how to remove an old recessed light housing can be found in this article.
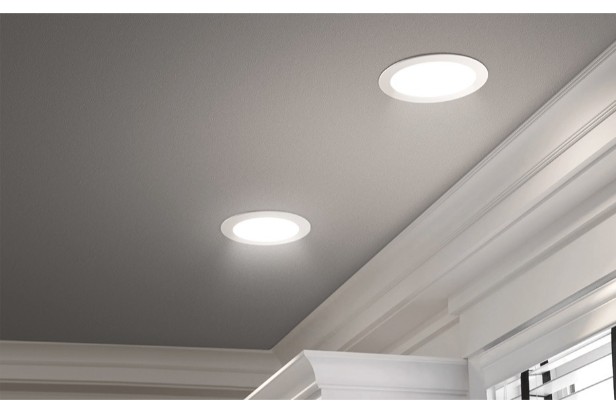
Any office, school, business, or home can be beautifully decorated with recessed lighting. Nowadays, it is very popular, because, on the one hand, the best-recessed lighting gives long-lasting performance, on the other hand, they provide extraordinary brightness and decoration.
The best part is that the updated recessed lighting is available in a variety of styles, allowing you to pick the light that best suits your needs. For example, you can see these lights in various sizes, colors, wattages, and designs. Additionally, the installation of recessed lights and other features are much more accessible.
Because of this, many people now replace the old recessed light and install the new one. However, if you’re a beginner and don’t know the proper procedure, you might have to struggle a lot to remove the old recessed light housing.
As a result, we’ll go into great detail about removing old recessed light housing in this article; this will give you plenty of inspiration at the outset.
Note: We strongly advise that you seek the assistance of a licensed electrician for any type of electrical work if you are a complete beginner with no prior knowledge of electrical wiring.
What is Recessed Lighting
Your home can look more aesthetically pleasing by using recessed lighting fixtures. Recessed lighting’s main purpose is to add additional illumination to your home’s larger opened spaces. These lights go by several names, including hat lights, pot lights, and can lights. These lights may occasionally cause an increase in your electric bill. Naturally, the kind of LED bulbs used in recessed lighting can reduce your electricity costs.
Before You Begin
The most popular method used by do-it-yourselfers to remove a recessed light involves removing the housing, replacing it with an old-work or remodel box, terminating the wires inside, and then covering the box with a blank ceiling box cover. Due to how simple, quick, and mess-free it is, this method is widely used. Although it does leave blank plates on the ceiling, the plates can be painted to match the color of the ceiling.
Tip
All but one of the recessed light locations can be covered with drywall if you have a network of connected recessed lights. As a secure ending point for the series, one remodel box—the first in the series—is installed. In the event that it is powering other devices, the circuit can continue to function with this.
Safety Considerations
It is not permitted to leave terminated live electrical wires buried inside walls or ceilings. The safe termination of wires must occur inside a permitted electrical box.
The box cannot be left in walls or ceilings. It is necessary for the box’s exterior (bottom) edge to be flush with the finished ceiling or wall surface1. The box’s cover plate cannot be faced with drywall or any other type of covering. The plate needs to be visible and reachable.
While it’s acceptable to leave abandoned dead wires in a ceiling or wall, it’s good practice to fully remove old wires whenever possible. This eliminates the chance that the wire will ever unintentionally become energized.
Read more: How to Clean Light Fixtures
How to Remove Old Recessed Light Housing
We’ll go over step-by-step instructions for removing the old recessed light can in this section. Let’s see.
What you’ll need before starting
- Step Ladder
- Screw Driver Set
- Voltage Detector
Method 1; How to Remove Recessed Light Housing
Step 1: Turn Off the Light
the recessed light must first be turned off. Wait 20 to 30 minutes for the recessed light to cool down because it typically stays warm for some time after being turned off.
Step 2: Turn Off the Breaker.
When working with electricity, safety must always be maintained. because electricity can still be present even after turning off several electrical wires. Because of this, before beginning any electrical work, always shut off the main switch or breaker.
Step 3: Turning the Light Counterclockwise
If the recessed light is on the ceiling, you can easily reach it with the aid of a ladder once it has cooled down.
Once the old trim has been removed from the housing’s outer ring, try to turn the bulb safely in a counterclockwise direction. Of course, you want to make sure there is no damage.
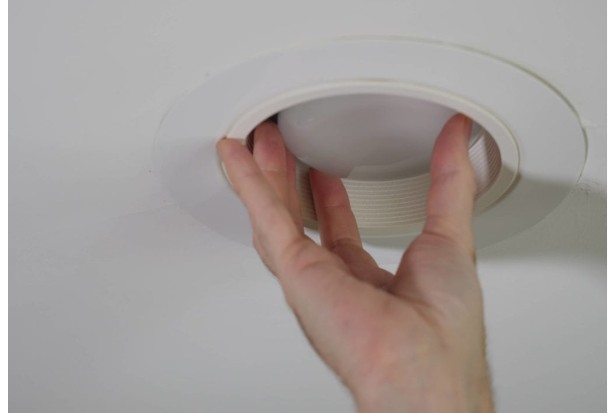
Step 4: Squeeze the Side Spring Clips
Squeeze the spring clip to make it simple to remove the light from the housing. The light socket is visible once the light has been removed from the housing.
Next, take the light socket and lightbulb apart. Check to see if electricity is being transmitted along the wire using a voltage detector for safety.
Step 5: Go to the Inside Ceiling
The majority of recessed light housing is found in attics or inside ceilings, so you must first safely access the attic to remove any concealed fixtures or electrical connections before finding all the cans, wiring, and fixtures from there.
Clear the area surrounding the can of any insulation and other extraneous items. Check the cable once more to see if it contains any electrical conductors by using the voltage detector.
Step 6: Unscrewing the Housing
Then you might notice that the cans are secured in place with a screw so that they do not move. The housing should now be completely separated from the interior ceiling by unscrewing all the screws that are surrounding the can with the aid of a screwdriver. Disconnect all of the housing from the ceiling using the same technique.
Step 7: Disconnect All Wire
Once the junction box is visible on each can’s side, you can access all the wiring by opening the junction box’s side.
The junction box’s housing wires can then be separated. The housing can be easily separated in this manner. You can easily separate each housing unit using the same technique.
Method 2; How to Remove Halo Recessed Lighting Trim
The procedure for removing the halo recessed light is much simpler and similar to our previous procedure, but there are a few considerations to make before moving forward step by step.
Step 1: Turn Off the Light
the recessed light must first be turned off. After that, allow the light to cool for 10 to 15 minutes.
Step 2: Turn Off the Breaker
As in the previous step, turn off the main switch or breaker to maintain safety.
Step 3: Slightingly Pull Down the Light and Squeeze the Side Spring Clips
Take assistance from a ladder once the light has cooled down if the halo recessed light is on the ceiling so you can reach it with ease. Remove the old trim from the housing’s outer ring after that, and then try to pull the light by pressing with both of your fingers.
The light can then be easily removed from the housing by squeezing the spring clip. The connected light socket can be seen once the light has been removed from the housing. Next, take the light socket and lightbulb apart.
Step 4: Go to the Inside Ceiling
You must enter the ceiling to locate all of the cans, wiring, and fixtures before you can safely disconnect all of the concealed fixtures and electrical connections.
Then remove all insulation and other extraneous items from the area surrounding the can. Check once more with the voltage detector to see if the cable inside the ceiling contains any electrical conductors of any kind.
Step 5: Unscrewing the Housing
The cans may then be installed with a screw around so that it does not move from its position. So, using a screwdriver, remove all of the screws holding the can in place. Next, completely separate the housing from the interior ceiling. Disconnect all of the housing from the ceiling using the same procedure.
Step 6: Disconnect the Wire
The junction box is then visible on the side of each can, and it can be opened to reveal all the wiring. After that, you can separate the housing wires from the junction box and see the junction box. The housing can be easily divided in this way. You can easily separate all the housing using the same technique.
Read more: How to Remove Track Lighting?
Other Recommended Maintenance
This would be a great time to learn how to change a light bulb in a high ceiling while you are learning how to replace recessed lighting housings. Although it can be installed in any room of the house, recessed lighting is usually found in rooms with higher ceilings. You will need to replace the lightbulbs after you replace the outdated housings for the recessed lighting.
The next thing you might want to check is the IC rating of the replacement recessed lighting. Prior to installation, it is crucial to confirm that the canister or housing is properly insulated and IC-rated. Examine the new recessed lighting housings’ manufacturer documentation. Consider exchanging them for ones that are IC-rated if they aren’t.
Last but not least, anything is possible if you notice a bad smell while replacing your old recessed lighting housing units. You might be smelling a dead mouse, which is possible. You might not notice a problem with pest control in your home until you smell it.
When your recessed lighting project is complete, you start to notice a dead mouse odor and wonder how to get rid of it. Make sure to contact the pest control company in your area. They could give you some helpful suggestions.
Final Verdict: Remove Old Recessed Light Housing
Rooms are illuminated subtly at ceiling level by recessed lights. However, the recessed lights might need to be taken out if a different lighting setup is preferred. Additionally, many owners believe it is best to remove certain types of recessed lights because they use too much energy. How can an old recessed light housing be removed? Disconnect the electrical, remove the trim, bulb, can, and turn off the power.