Track lighting replacement is much more labor-intensive than removal. Therefore, don’t worry; we have outlined the entire process in a manner that will clear up all of your confusion.
Can You Change the Track Lighting?
Your track lighting is changeable; you can remove it or replace it. Although there are only a few simple steps, you must be familiar with each one in detail. A number of channels will be wired and connected to the ceiling. Therefore, you must exercise caution when turning off the lights.
How to Remove Track Lighting from Track?
The fixtures in track light kits, which frequently have three or four, can be installed anywhere along the track’s length. Any number of track light fixtures, regardless of fixture style, can be accommodated on the tracks. Although you can add up to seven fixtures on a single 4-foot track if it’s the only thing on the circuit and you don’t use more than 80% of a 15-amp lighting circuit’s available wattage, you probably shouldn’t try to add more than four fixtures. Once you know how, replacing and removing track lighting fixtures is easy.
- Your track light fixtures’ light switch should be turned off. Hold a non-contact voltage tester next to the ceiling track. The tester shouldn’t light up or make an audible alarm if the circuit isn’t receiving power.
- Take hold of the fixture surrounding the tiny square that is positioned next to the track. Pull the square downward. By pulling on the square, you can rotate the fixture left or right by releasing the tabs holding it to the track.
- Remove the track light fixture from the ceiling track. When you go to a lighting store, bring the track fixture with you to ensure that the replacement fixture has the same arrangement of electrical contact tabs as your original fixtures. This is because some track fixtures have three contact tabs, while others only have two.
- Install new track lighting fixtures by putting the electrical contact tabs into the track. To connect the tabs to the copper slots in the track, rotate the fixture to the left or right. Once it snaps into place, you can release it. To power, the track, flip on the light switch.
How to Change Light Fixtures on Track Lighting
Things You’ll Need
- Stepladder
- New track light fixtures and bulbs
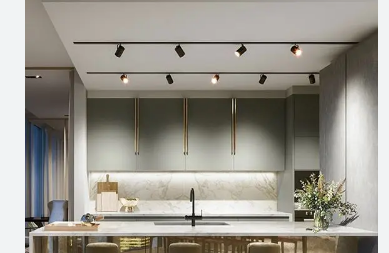
Beyond directional lighting control and energy savings, track lighting also offers the chance to upgrade or alter the assembly’s overall appearance by changing the type or style of the individual lighting fixtures. Changing the light fixtures, often referred to as lighting “heads,” is a simple procedure that can be completed in a few minutes to give the track light a whole new look.
Step 1
By using a stepladder, you can reach the lighting fixture track.
Step 2
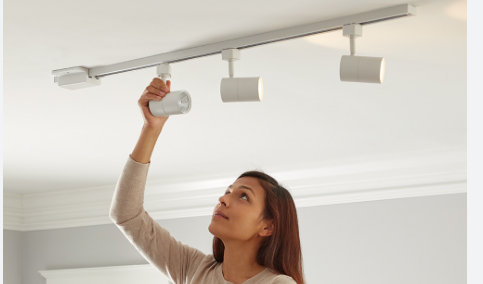
By pushing or sliding the locking tab on the base of the track light fixture downward, you can remove it. Then, to free it from the track channel, turn the base counterclockwise.
Step 3
Place the new track light fixture’s end connection into the track channel, being careful to line up the indicator line or arrow with the designated side of the track. Then, turn the base of the fixture clockwise within the track channel to secure it in place. Most lighting tracks have an imprinted line on one side of the track’s length to designate the “hot” side of the track, and the lighting fixtures themselves have a similar line or arrow designation for alignment.
Step 4
Before adjusting the target direction of the new track light fixture, put the bulb in it.
Step 5
If you want to replace any additional track light fixtures, repeat Steps 2 through 4 in their entirety.
How Do You Replace Track Lighting With Recessed
Your home’s atmosphere can be changed by high-quality recessed lights. Recessed lighting comes with its own housing and bulbs. This means that if you want to replace track lighting with recessed lighting, you must remove the entire fixture as well as any associated electrical components. However, installing one instead of replacing one is simpler. You will require some cables and an additional junction box in this situation.
Why Do My Track Lights Keep Burning Out?
For many different reasons, track lights can burn out. The loose wire is one of the most prevalent causes. The current flow will continuously fluctuate if the wire is loose on the way to the lightbulb. The lifetime of the light will be shortened by this fluctuation.
The same thing will occur if the fixture is improperly connected. Alternatively, you should look at the main connection and the way the voltage is being distributed to those lights.
Monorail Track Lighting Troubleshooting
You will receive the required instructions along with all the parts for installing a monorail. Instead, we will provide you with a summary right here to help you better understand the procedure. Installing a transformer is the first step. Expand the wire in the direction of the J-Box from the accessible spot. After that, set up the canopy using J-Box.
The remaining steps are very straightforward. Create the rail’s shape and attach the support to the ceiling. So that the rail and transformer can be secured, raise it. Install the adapter and turn it on to test whether it is operational.
How to Install Track Lighting
For each unique fixture, a different mount system is used. Some of them have a screw in the middle, while others have one on the edge. Remove the bulb cover and the bulb according to the system. In order to lower the fixture, loosen the screw holding it. Three different colored wires are visible when the wire tape is removed. They are the black hot wire, the white neutral wire, and the green ground wire.
Use screws to fasten the mounting plate. In order to secure the track, drill a hole where the mounting screws are located. The product will come with thorough installation instructions. Drag the wires to the terminals after the track has been installed. Finally, use the provided plate to cover the track, and your track light installation is complete.
How Do I Fix Track Lighting?
You can replace the bulb in your track light if it stops working. The problem may not always be resolved by simply changing the bulb, in which case additional work will be required.
In order to avoid serious risk to yourself, first turn off the main power switch. Next, use a tester to inspect the track. The tester will beep when it has found a live one. Keep an active track and get rid of the others.
Remember not to use anything that will dampen the area when cleaning. A screwdriver can be used to lift the metal contacts and tighten any loose connections. Track lighting should be replaced, and the wiring bridge connection should be verified. Push the connection back if it is not tightened. That will be sufficient; if not, create a new socket.
How to Clean Track Lighting
Never forget to disconnect any electrical equipment before working on it. Being connected to the power supply makes working extremely dangerous. Start by removing each component one at a time, such as the bulb, cover, socket, etc. Use any brush you like, or you can also use a piece of cloth. If you use a damp cloth, make sure everything is completely dry before reconnecting.
FAQs
Why Does My Track Lighting Not Work?
Check that particular light or the holder if only one bothersome light is present. Your issue can be resolved by changing the holder or the lightbulb.
What is the Advantage of Having More Than One Track System?
There are three different systems available here, giving users flexibility.
Which Track System is Better Among the Three of Them?
By both design and construction, the three of them are dissimilar from one another. Therefore, you cannot compare them. Here, customer preferences come first.
Conclusion
Everyone is aware that even a little knowledge can be harmful. Working with electrical equipment has a similar risk of losing your life. Don’t put yourself at risk by working without knowing how it should be done. We are prepared to guide you at every step. We anticipate that using our technique will make the removal of your track lighting trouble-free.